
Project introduction
This is a pattern overview, not a full tutorial, for a full-size monkey amigurumi from Spin a Yarn Crochet. It explains the design, its flat panels, and its color work, while the complete row-by-row instructions stay with the original designer. For the full pattern, follow this link: Original designer’s pattern and instructions.
The monkey has a cheeky character, and the designer presents it as a wall hanging for a nursery or a child’s bedroom, or as a piece hung from a shelf. Its hands can stay empty or hold a small crocheted item such as a banana. A branch is optional for a wall hanging and is not needed for the monkey. The branch pattern comes from the designer’s sloth pattern, and the heart pattern is separate; neither is included in this post, although both are free on the designer’s blog.
The Details
This design follows the Ragdoll style, in which the body, legs, tail, head, ears, and arms are each made as separate flat panels in flat rows and then joined. That joined flat construction gives the finished monkey its distinctive two-dimensional look. Tapestry crochet is used, with color work on the face, so read the color change guidance below before starting.
The finished piece measures approximately 28cm/15″ from top to bottom. The web pattern is free, while a formatted, ad-free PDF version is available to purchase; the free web version does not by itself show that every format is free.
Materials
Gather the items below before you begin, and check the yarn shades and small notions against the original pattern as you work.
- Bernat Premium, shade Milk Coffee, in an amount of less than one 198g skein
- Bernat Premium, shade Taupe Heather, in an amount of less than one 198g skein
- Black crochet thread
- Safety eyes, 12mm
- Stitch markers
- Stuffing
- Tapestry needle
- Main hook, 3.25mm
- Smaller hook for the nose, 2.25mm
Reading this Pattern and Colour Changes
Single crochet is the default stitch, unless the original instructions say otherwise. In color change rows, the usual abbreviation before a stitch count is left out, and the color letter takes its place. For example, Dinc means an increase worked in dark brown, while D3, L15 means three stitches in dark brown followed by fifteen stitches in light brown.
Color work can leave two or three balls of yarn attached at once, so prepare small separate balls for the areas on each side of the face. Keep unused yarn carried along the back of the panel, and never work it inside a stitch. To change color, start the final stitch of the old color, pull up a loop, then finish that stitch with the new color.
Always drop yarn on the wrong side of the panel. On the front panel, odd-numbered rows show the right side toward you, and even-numbered rows show the wrong side toward you. That rule helps the carried yarn stay hidden and the face stay neat.
Colour legend
Only two color letters are used, and they replace the usual stitch abbreviation in color change rows. Keep this short key beside you while working the face.
| Letter | Color |
|---|---|
| D | Dark brown |
| L | Light brown |
Terms and Stitches
The abbreviations below cover the stitches and shaping used across the panels. They are standard terms, so a maker can focus on panel order, color changes, and joining rather than decoding new symbols for every piece.
- Ch: chain
- Slst: slip stitch
- MR: magic ring
- Sc: single crochet
- Inc: increase, worked as a regular single crochet increase
- Dec: decrease, worked as a regular single crochet decrease
- Sc3tog: single crochet three stitches together
- Hdc: half double crochet
Leg


Each leg is a flat panel worked from the top toward the foot, starting in dark brown and changing to light brown for the foot area. A matching back panel is made, the two panels are placed together, and they are joined by working single crochet around the edge.
Add stuffing when about three quarters of the edge is joined, top it up every three or four stitches, close with a slip stitch, tie off, and tuck the tail inside. Join the second leg facing the opposite way, so the pair mirrors each other.
Tail


The tail is made in dark brown as two separate pieces that are then joined, and the same work is repeated for a matching back panel. Place the panels together with their rows lined up, then join them by working single crochet around the edge. If you want a stronger tail, wire can be inserted while working around the edge. Unlike the legs and body, this tail does not need stuffing.
Body Panel
The body panel is worked upward from the bottom in dark brown as a flat panel. It is deliberately asymmetrical, using perspective so the finished monkey looks as if it is moving while hanging. After tying off, make the same panel again for the back of the body, so the front and back can later be placed together and joined during assembly.
Head Panel
The head panel is worked upward from the bottom, beginning in light brown. Like the body, it is deliberately not symmetrical, and the perspective helps the finished monkey appear to be in motion while hanging. After the first rows, color work forms the face, and the remaining rows are worked entirely in dark brown. A matching back panel is worked entirely in dark brown, without face color work, and both panels are set aside for assembly.
Ears
Each ear starts in a magic ring but is worked in turned rows rather than in the round, beginning in light brown. The front panel changes to dark brown after the second row, while the back panel is worked entirely in dark brown. Place the front and back panels together and join them by working around the edge through both layers.
Stuffing is added when about two thirds of the edge is complete, topped up as you continue, and the ear is closed, tied off, and set aside. Repeat the whole process for the second ear.
Arms
Each arm is worked from the shoulder toward the hand, beginning in dark brown and switching to light brown for the hand section. A back panel is made, the two panels are placed together, and they are joined around the edge. Stuffing is added partway around the join and topped up as you continue, then the arm is closed and tied off. Repeat for the second arm, and set both arms aside until the final assembly step.
Nose


The nose is a small piece worked in the round around a starting chain, using black crochet thread and the smaller hook listed in the materials section. It is a compact finishing detail that is stitched onto the face during assembly, rather than a large panel, and the work is tied off when the round is complete.
Step 1: Body, Legs, and Tail

Cut three lengths of dark brown yarn, each about 12″/30cm, and set them aside. Place the two body panels together with the front facing you, then join them by working single crochet around the outside edge, starting at the bottom opposite the tail.
At the row 9 stitch marker, place the first leg with the foot facing up and the toes pointing away from the body, stitching through the back panel, the leg, and the top panel, then secure it with a knot and hide the tails between the panels. Sew the tail in place in the same way at the top, add the second leg on the side, stuff the body firmly while topping up as you go, then close it with a slip stitch, tie off, and tuck the tail inside.
Step 2: Face, Head, and Ears
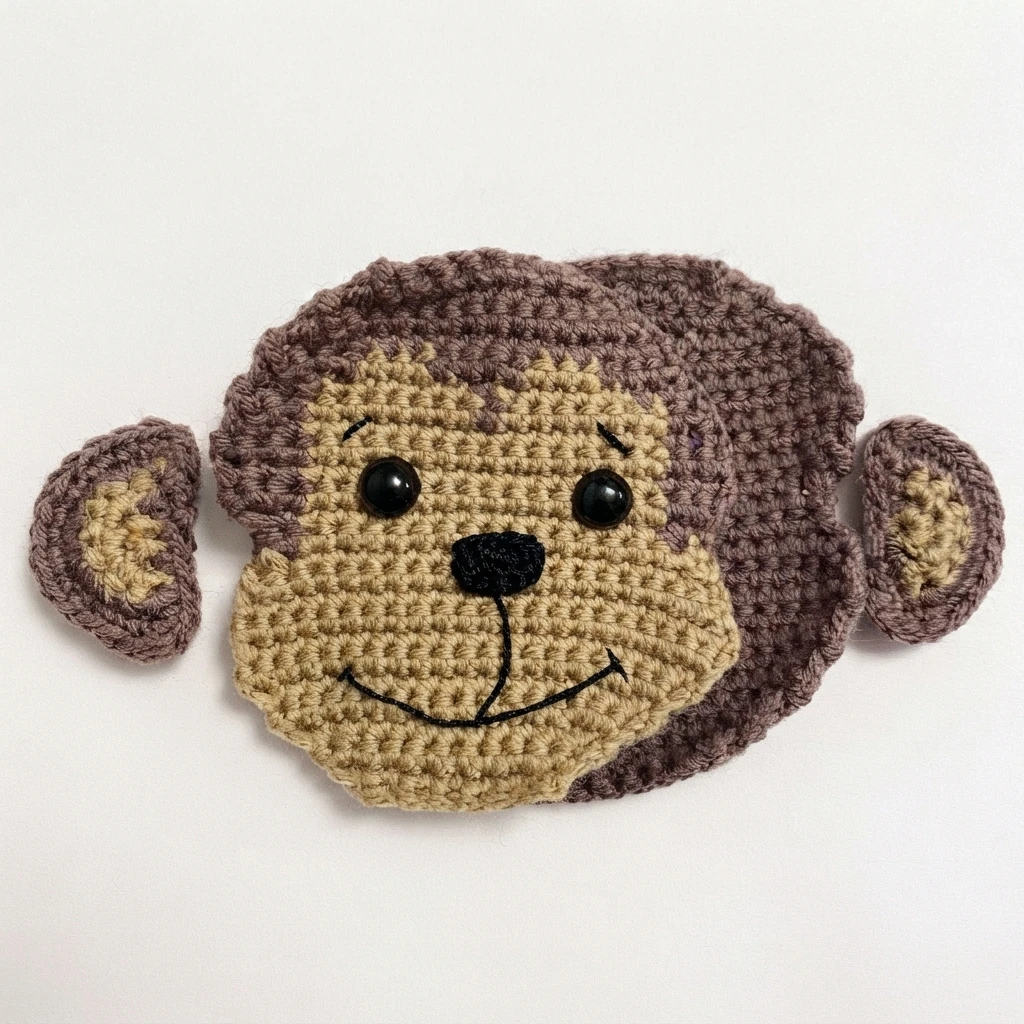
Place the safety eyes between rows 14 and 15, about 5 to 6 stitches in from each side. Stitch on the nose, add an eyebrow about 2 rows above each eye, and stitch the mouth with black crochet thread. Cut two lengths of dark brown yarn, each about 12″/30cm, and set them aside for the ears.
Place the head panels together with the front facing you, then join them by working single crochet around the outside edge, starting at the top in dark brown. Secure each ear through the back panel, the ear, and the top panel; at the ear itself, work only the front panel stitches, since that section is already sewn shut, then work both panels together again, switching to light brown where appropriate.
Repeat for the second ear, switching back to dark brown where appropriate, stuff the head firmly while topping up as you go, then close it with a slip stitch, tie off, and tuck the tail inside.
Step 3: Head, Body, and Arms
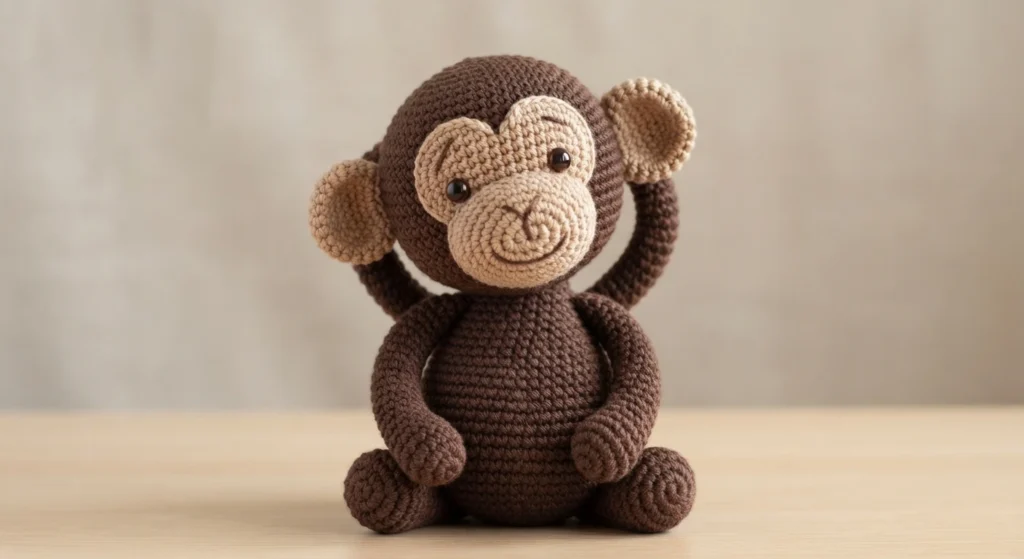
Stitch the back of the head, toward its top, to the front of the body, toward its bottom, giving the head a slight tilt. Stitch back and forth several times for security, joining about 3 rows together. Then stitch the arms to the bottom of the body panels so they stay hidden and stick out from behind the head and ears.
Finished items made from this pattern may be sold with a link back to the original post, while the pattern text and photos themselves remain the copyrighted property of Spin a Yarn Crochet and should not be copied or reproduced.


