Project introduction
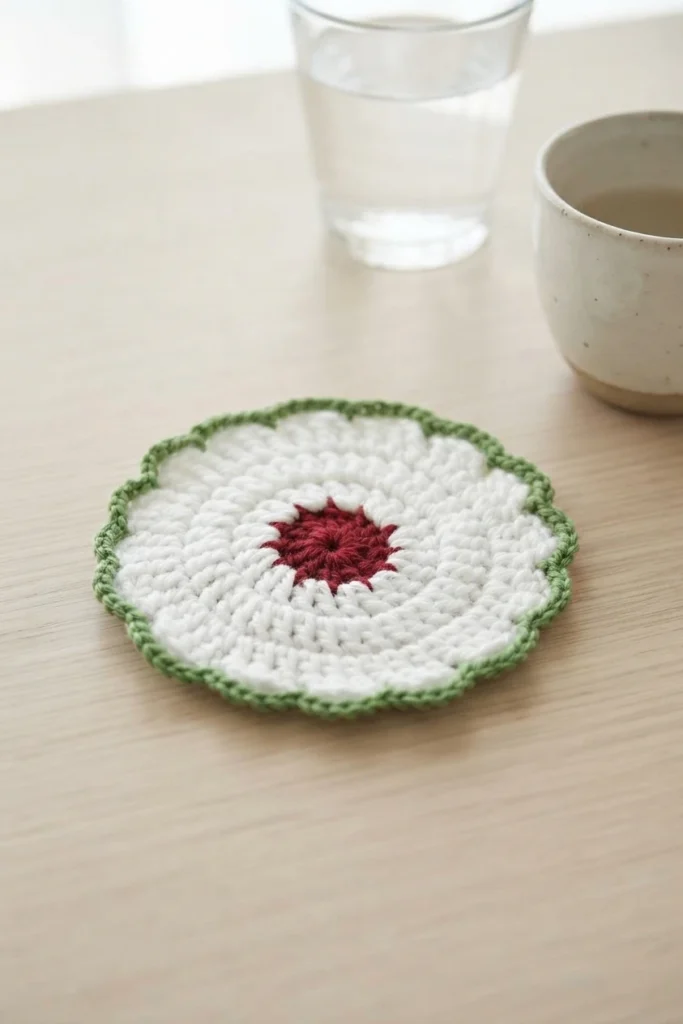
This pattern overview introduces a free flower coaster design that turns a simple cup of tea or coffee into a brighter moment at the table, while also giving a useful layer of protection for wood, stone, and other surfaces that can mark easily. For the full project, follow the Original designer’s pattern and instructions.
A handmade coaster can soften a busy kitchen or a quiet reading corner, adding color and texture without taking up much space, while the floral shape keeps the look light and nature inspired. It also helps shield a table from heat and damp rings.
Trendy Table Crochet Flower Coaster Pattern That Adds Style
Each coaster takes a flower shape, with layered petals that give the surface depth and a finished look that feels thoughtful rather than flat or rushed. Soft but sturdy yarn keeps the piece pleasant to touch and strong enough for regular use, so beauty does not come at the expense of everyday function. A finished set also makes a personal gift.
These coasters move easily from an ordinary weekday meal to a gathering with friends, where a small handmade detail can warm the table without overwhelming the setting. Used as a quiet accent or seasonal display, each piece adds color, texture, and cheer to everyday routines.
Special Features
This design balances looks and usefulness, so a finished coaster can sit proudly on a table and still protect the surface beneath a mug or glass. Color choices can be mixed freely to suit a room, a season, or a recipient, and guided steps help newcomers learn core techniques with confidence.
The same round base can also support other ideas, such as a flower pot cover or a piece of wall decoration, which extends the value of one small project. That flexibility makes the pattern useful well beyond the table alone.
Materials Needed
Gathering supplies first keeps the project smooth, because color changes and finishing steps are easier when scissors, a needle, and markers are already within reach. Choose yarn colors that work together for the center, leaves, and petals. Check hook comfort too.
- Yarn in various colors for the coaster and flowers
- 3mm crochet hook, or any size appropriate for your yarn
- Scissors for cutting yarn neatly
- Tapestry needle for sewing tails
- Stitch markers for rounds, optional
- Bobby pin for marking stitches, optional
1. Creating the Magic Ring
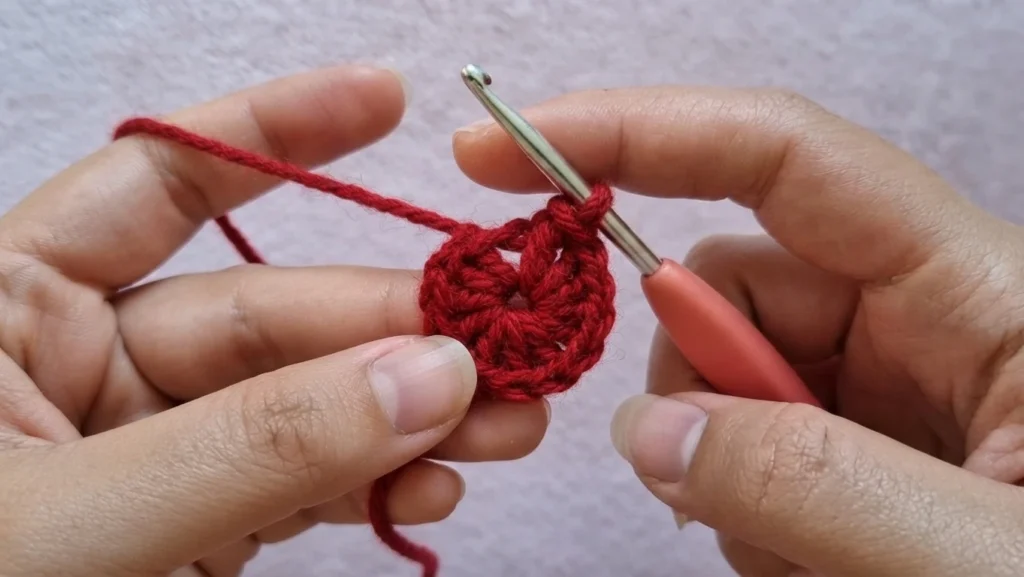
The project starts with a round center formed from yarn wrapped around two fingers, creating a loop that can be closed neatly once the first stitches are in place. This adjustable start keeps the middle tidy and gives the coaster a clean foundation for later rounds.
2. First Round: 12 Double Crochets in the Magic Ring
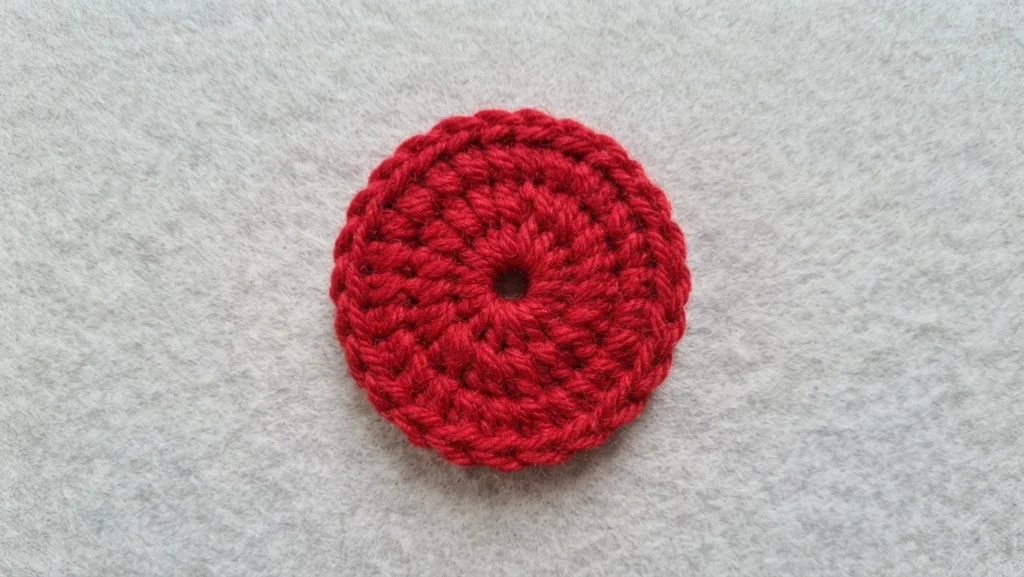
The opening round builds the center to 12 stitches, counting the starting chain as the first stitch for this round only. Once complete, the tail closes the ring, a slip stitch joins the round, and yarn can be cut for a color change.
3. Second Round: Increasing to 24 Stitches
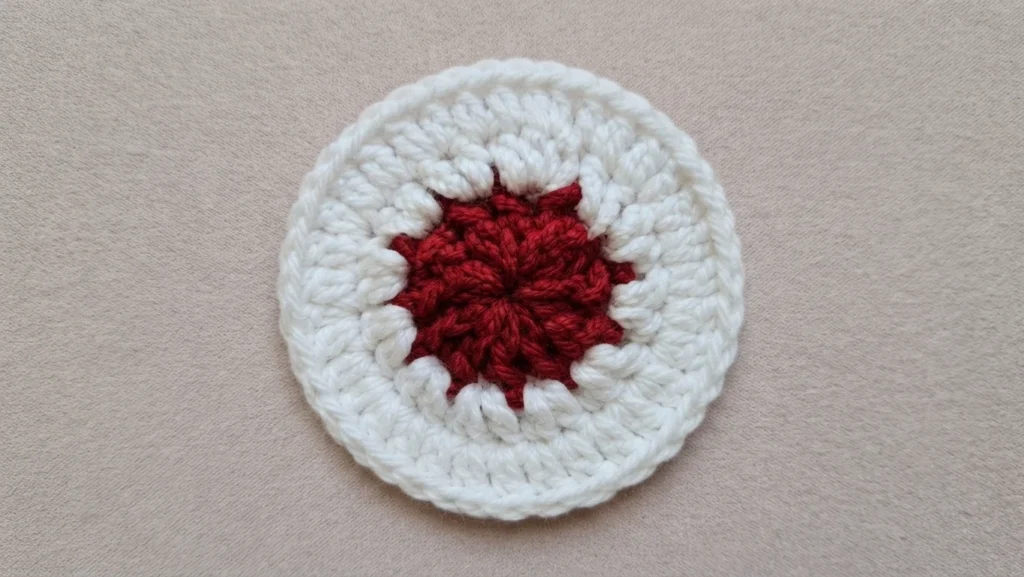
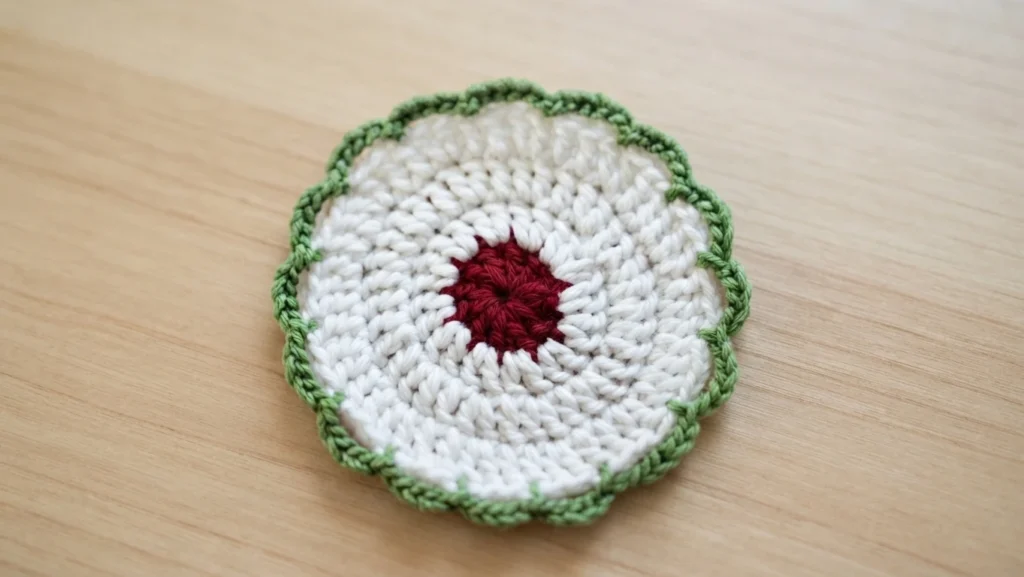
A new color begins this round, secured with a double knot after the previous yarn is cut. The starting chain does not count here, and two double crochets in each stitch expand the circle to 24 stitches before joining the round.
4. Third Round: Increasing to 36 Stitches
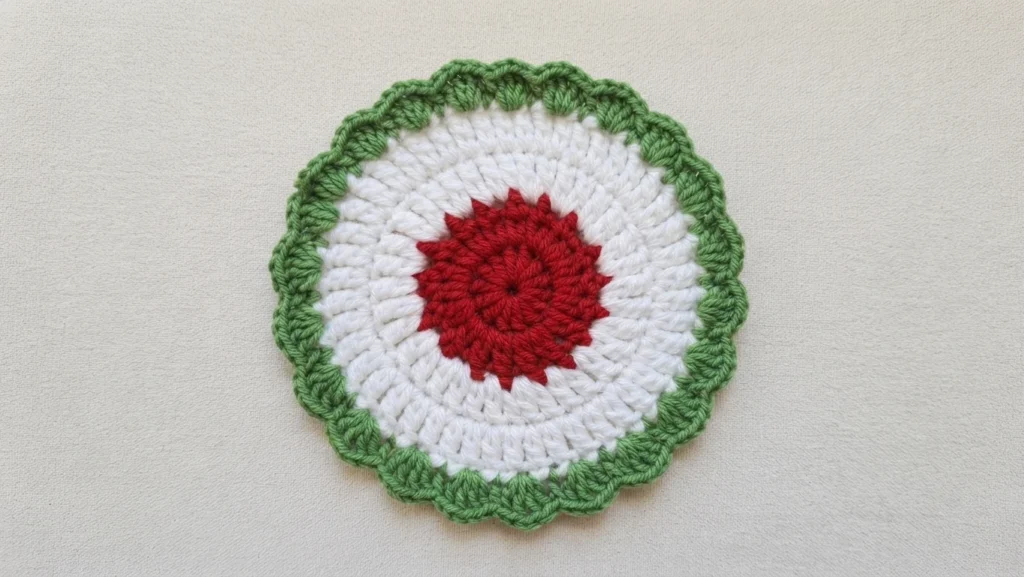
The third round alternates one double crochet with an increase in the next stitch, repeating that pairing steadily around the circle. After 12 repetitions, the round reaches 36 stitches and closes with a slip stitch into its first double crochet.
5. Fourth Round: Increasing to 48 Stitches
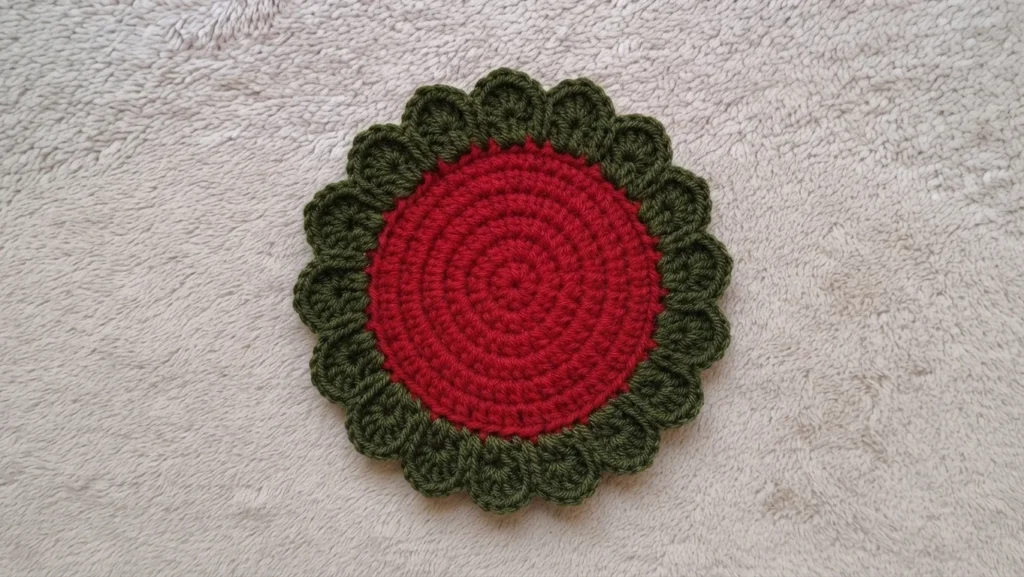
The fourth round works two double crochets in separate stitches and then an increase, repeating that sequence around the circle. After 12 repetitions, the total reaches 48 stitches, closed by a slip stitch into the first double crochet with a flat shape.
6. Adding Leaves
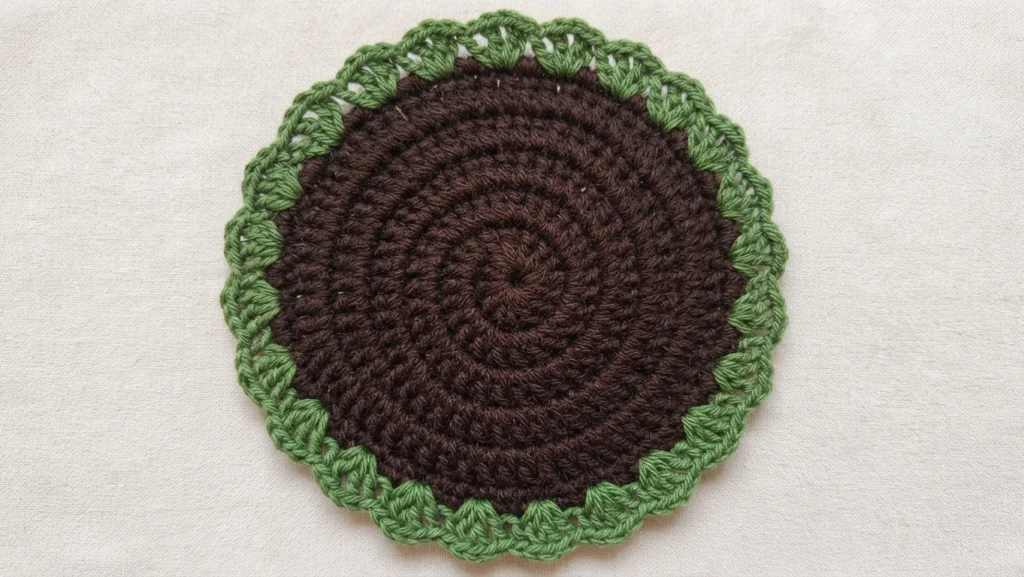
Green yarn marks the move to the leaf layer, joined with a slip knot against the finished edge. The first space uses six chains, later spaces use five, and each space skips two stitches and slips into the third, until 16 spaces are complete.
7. Adding Details to the Leaves
Leaf texture is built inside each chain space in green yarn, with a rounded shape made from repeated double crochets and a single crochet finish. A triangular shape uses seven chains and a slip stitch into the fourth chain, and the shapes alternate until the round closes at the first petal before fastening off.
8. Adding Flower Petals
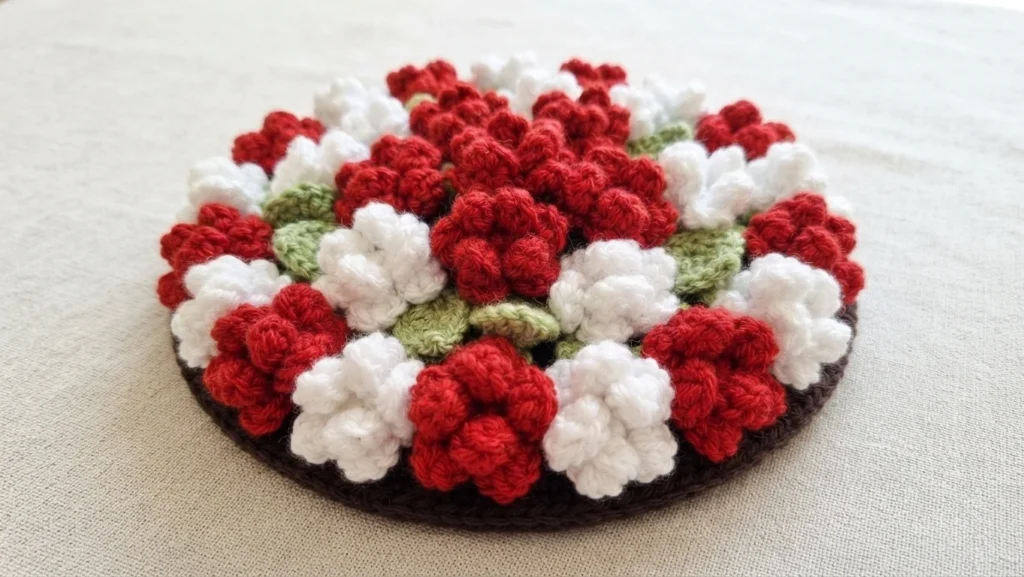
A contrasting color brings the flower to life, with puff stitches worked into the chain spaces to create soft, raised petals. Each puff gathers six unfinished loops, drawn through together and secured with a chain, repeating across six spaces before the petals are joined. Fastening off and tying loose ends completes the finish.
Special Features
This flower design has become widely popular for its distinctive and detailed look, which stands out without feeling fussy or difficult to display. Makers can vary colors and patterns to suit personal taste, and the idea can serve as a coaster, accent, wall decor, or flower pot.
Level of Difficulty
This project suits makers at beginner to intermediate level, using familiar chaining, single crochet, double crochet, increases, and slip stitches. Puff stitches add a new challenge, so absolute beginners may want extra practice before working that part with full confidence.
Tutor’s Suggestions
Pull the magic ring tail gently to form a clean loop without fraying the yarn, a small habit that protects both the center and the finished look. Marking the first stitch of each round helps track progress, and practicing the puff stitch builds confidence.
Uses
Finished pieces can protect tables from scratches and spills while adding vibrant charm, or they can be framed and hung as wall art or table decoration. Custom colors also suit personalized gifts, and more rounds can extend the idea into larger flower pot projects.
Bonus Tip
With several colors in play, steady yarn tension helps the finished piece keep its shape, and double knots on joins guard against unraveling over time. Weaving tails carefully after each color change keeps the piece tidy and looking neat and professional.
Conclusion
This overview shows how a small flower coaster can build crochet skills while producing a delightful and functional piece that suits many styles and settings. Whether used on a table, displayed as wall art, or adapted as a planter accent, the design offers a fun and stress free making experience. For related ideas, see Crochet Spring Heart with Snowdrops Wall Decor: Pattern Overview and Very Versatile Layered Flower Brooch: Pattern Overview.


2 thoughts on “Crochet Flower Coaster Pattern Perfect For Gifts And Decor: Pattern Overview”