Project introduction


This pattern overview introduces a free crochet carnation from Moara Crochet, released at the start of 2025 as the first flower pattern of that year. It belongs to a monthly series shaped around birth flowers, with a different bloom planned for each month. January brings together snowdrops and carnations, and the designer notes that a separate free snowdrop pattern is also available for makers who want a matching pair.
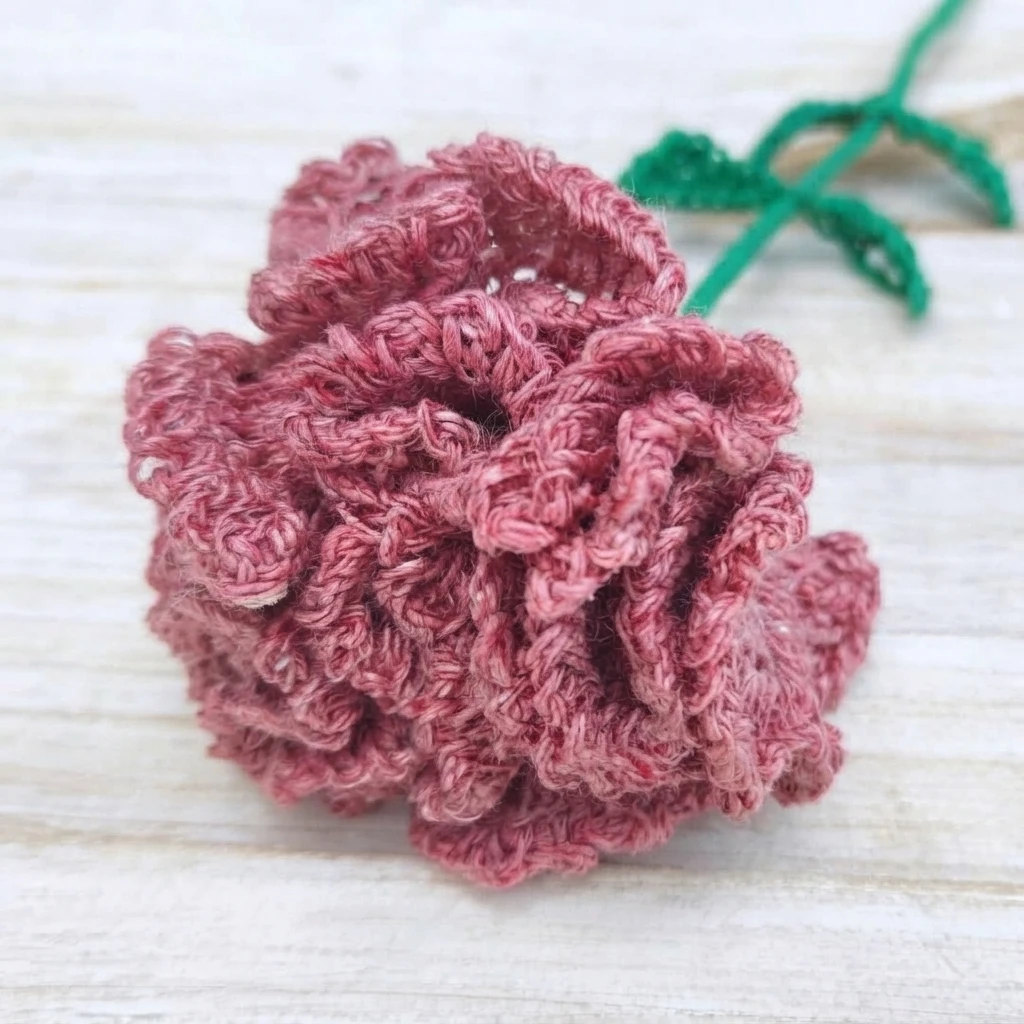
The carnation is presented as a full, bursting bloom made from delicate layers of many petals, linked in the source to the warmth, love and affection associated with people born in January. Because it can be worked in a huge range of colours, the same design can suit different occasions, styles or moods. Start with the Original designer’s pattern and instructions for the complete photo tutorial and video option.
Materials
The sample uses sport weight yarn and a small hook to keep the stitches tight, which helps the finished pieces hold their form. The designer describes the project as easy and suitable for nearly any yarn already in your stash, although changing the yarn will change the finished size.
- 30-50 meters sport weight yarn, Circulo Amigurumi Yarn in baby pink for the sample
- Optional: 20 meters sport weight yarn in a contrasting colour for the tips
- 20 meters sport weight yarn, Circulo Amigurumi Yarn in Brazilian Flag for the sample
- Matching crochet hook for your yarn, 2mm hook used for the sample
- Scissors
- Tapestry needle
- 40cm piece of wire
- Pliers
Gauge is listed as not applicable. The finished sample flower measures 10cm in diameter, and the overall stem is 26cm when made with sport weight yarn and a 2mm hook. The work is made in the round, and the complete flower is built in three sections, the flower itself, the receptacle and the leaves, with wire and wrapping used during assembly.
Crochet Stitches
Only four stitches are listed for this design, which keeps the overview approachable once you are comfortable with the basics. They are slip stitch (sl st), single crochet (sc), half double crochet (hdc) and Double Crochet (dc). The source describes these as a few advanced crochet stitches, so take a moment to refresh each abbreviation before following the designer steps in full.
Flower


The flower section is worked in the round from a magic circle, beginning with double crochet rounds and a single crochet round before increases expand the piece quickly. This widening creates the dense base needed for a carnation that looks full rather than flat. The shaping stays in one piece, so the bloom grows steadily from its centre instead of being joined from separate petals.
A dedicated petal round finishes the head with a total of 24 petals, formed with a repeating mix of single crochet, half double crochet and double crochet stitches. An optional final round can change colour to give the tips a contrast edge, after which ends are fastened off and woven in. For exact row by row working, follow the designer instructions rather than relying on this summary.
Receptacle

The receptacle is the green cup that sits beneath the bloom and helps the flower sit neatly on its stem. It starts with a magic circle in green yarn, leaving a 2 meters tail that is saved for wrapping the stem later. Single crochet increases widen the start, then several even rows build depth before fastening off with a 50cm tail left for sewing during assembly.
Leaves (Make 2)


Make two leaf motifs to balance the stem. Each one begins after leaving a 1.5 meter tail, then a foundation chain of 17 sets the length. One side is worked in a short sequence of slip stitch, single crochet, half double crochet and double crochet stitches, then the work turns so the other side can be completed with the tail yarn, forming a double leaf motif.
How to Assemble Crochet Carnation Flower


Assembly brings the three sections together around the wire listed in the materials. The wire is bent in half and threaded through the centre of the flower, weaving in and out of the first 3 rows. It then passes through the receptacle, which cups the first 4 rows of the flower, and the 50cm tail is used to sew the flower securely into that cup.
Next, the 2 meters tail wraps around the folded wire to cover the stem. The first leaf is inserted at its central chain, described as chain 9, when wrapping reaches 8-10cm below the flower. The second leaf follows 6-8cm below the first, the wire tips are folded up for a smooth tip, and wrapping continues to the end before fastening off.
If petals fall down, especially on a larger flower, the source suggests adding a stitch between the petals to secure them. This overview is a guide to the design, not a replacement for the full pattern. For more flower projects, see Granny Flower Pot au crochet: Pattern Overview and Flower Opossum with Baby Bee Possums: Pattern Overview.