
This pattern overview introduces the Dottie Bonnet and explains what the project involves, without replacing the full tutorial. It is a helpful preview for makers who want to check the style, size range, texture, and finishing stages before they begin. Use it to plan your time, then follow the original designer instructions for the complete pattern.
For the complete instructions, open the Original designer’s pattern and instructions from The Moule Hole. The web version is described as a free pattern, while the separate printable PDF version is paid, so free web access does not mean every format is free.
The bonnet starts as a single rectangle in single crochet with puff stitch texture. After the rectangle is finished, it is folded in half, seamed at the back, and finished with bottom and front edgings before the straps are added. The finished bonnet is shown styled with the matching Dottie Dress in the source photographs.
Beginner Crochet Pattern: The Dottie Bonnet


The Dottie Bonnet is presented as a beginner friendly project because its main shape is simple and its texture comes from a repeated stitch combination. Single crochet forms the calm background fabric, while puff stitches add soft raised detail across the rectangle. That balance makes it a good choice for a maker who is comfortable with basic stitches and wants a pretty, wearable baby project.
Materials


The source Materials heading does not list a specific yarn brand, hook size, needle, or stitch markers, so this overview does not guess those details. Check the original pattern for the exact tools before you start, and use the size table below for the approximate yarn amount for your chosen size.
- Yarn for your chosen size
- Hook and finishing tools as specified in the original pattern
- Matching Dottie Dress only if you want the photographed styled look
Gauge

The stated gauge is 20 sts/20 rows = 10cmX10cm (4X4 inch) in sc. The source strongly recommends a gauge swatch, and that advice makes sense for a baby bonnet because a small difference in tension can change how the finished piece fits around the head. Make your swatch in single crochet, compare it with the stated gauge, and adjust your approach if your tension is clearly different before starting the main rectangle.
Stitches & Abbreviations Used
The pattern uses US crochet terminology and a short set of abbreviations. Learning them before you start will make the overview easier to follow and will help you move smoothly between the body, edgings, and straps in the original instructions.
- ch: chain stitch
- puff: puff stitch
- RS: right side
- sc: single crochet
- sp: space
- st or sts: stitch or stitches
- WS: wrong side
- yo: yarn over
Measurements & Yarn Requirements
The size range covers babies and young children, and every yarn amount below is approximate. Choose the size by approximate head circumference, not by age alone, and allow for the sample specific estimates given in the original pattern.
| Size | Approximate head circumference | Approximate yarn |
|---|---|---|
| 0-3 months | 41cm/16in | 132m/144yds/40g |
| 3-6 months | 43cm/17in | 165m/181yds/50g |
| 6-12 months | 46cm/18in | 248m/271yds/75g |
| 1-2 years | 48cm/19in | 281m/307yds/85g |
| 3-5 years | 51cm/20in | 314m/344yds/95g |
Special Stitch
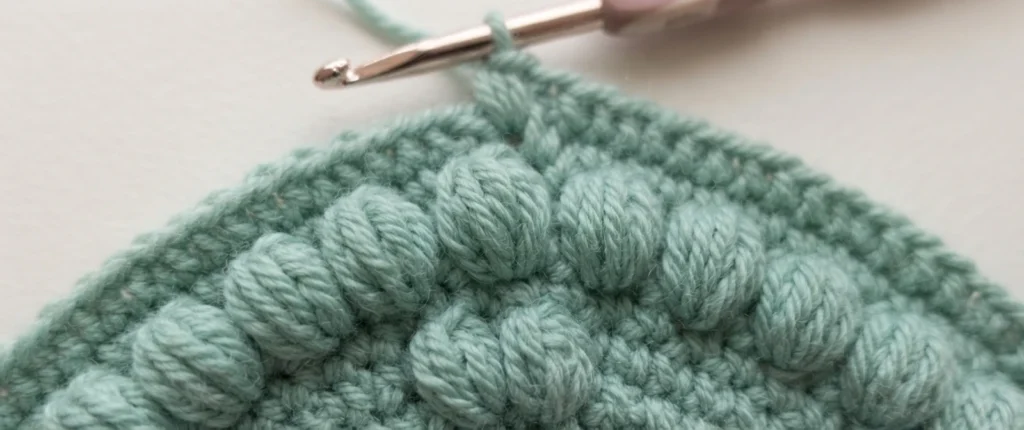

The puff stitch gives the bonnet its soft raised texture. In the original definition, you yarn over, insert the hook, and pull up a loop, then repeat that sequence four more times until 11 loops sit on the hook. Next, you yarn over and pull through 10 loops, then yarn over again and pull through the final 2 loops to complete the stitch.
Pattern Testing Photos
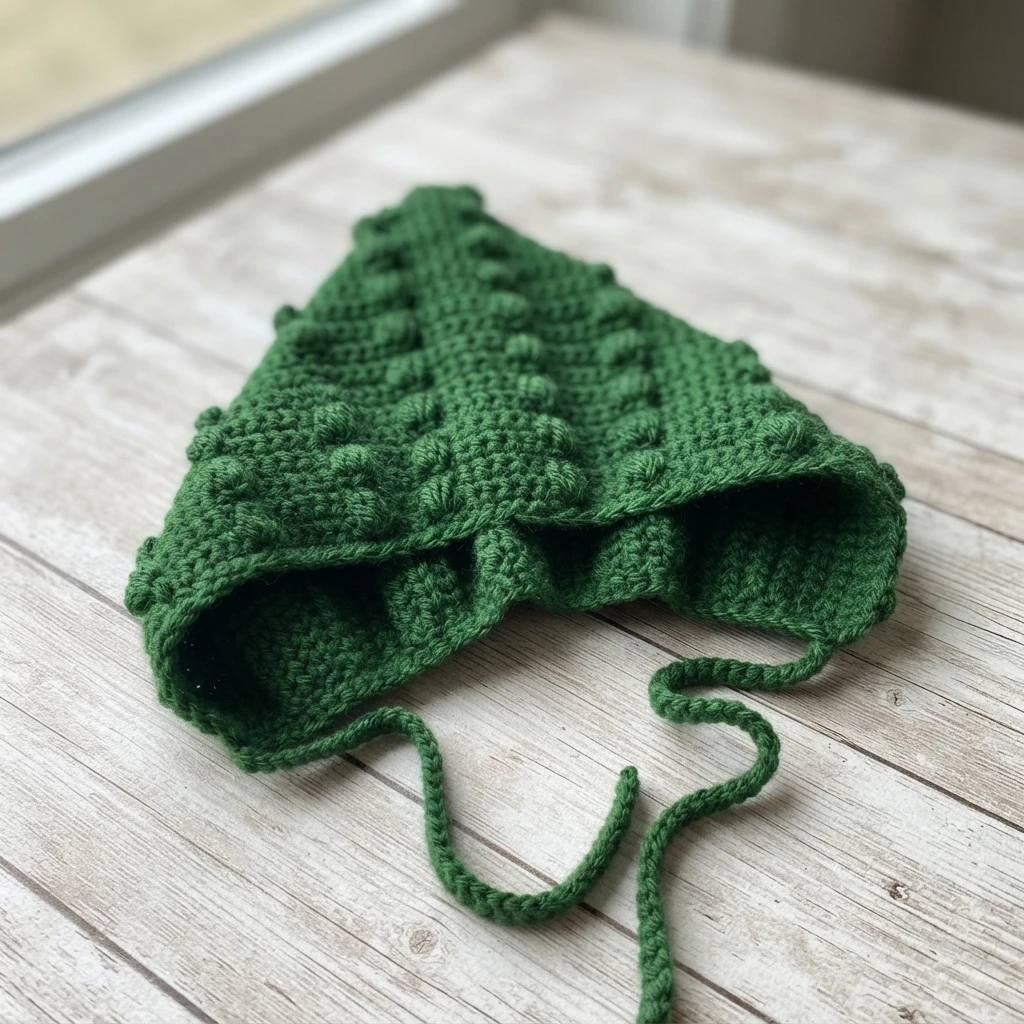

The original page showcases versions made by pattern testers, and those finished bonnets are a useful preview of how the shape and texture look on different babies. Tester photographs can help you picture the bonnet in real use, especially the way the front edging frames the face and the straps sit under the chin.
Bonnet Body
The body begins with a long tail left for seaming and a starting chain of 57 (64, 71, 71, 78), with the number depending on the size you choose. The rectangle is worked mainly in single crochet, with puff stitches adding texture at intervals, and plain single crochet rows between the textured rows.
For the five sizes in order, that finished body length is 14 (15, 16.5, 18, 19) cm and 5.5 (6, 6.5, 7, 7.5) in. End on a right side row and do not break the yarn, because the next stage continues from the same working yarn.
Seam

Fold the rectangle in half with the right side facing inward, then use the tail left at the start to seam the back of the bonnet. Once the back seam is secure, turn the bonnet right side out so the right side faces outward and the shape becomes clear. This simple fold is what turns the flat rectangle into a three dimensional bonnet form.
Seam
The repeated seam heading in the source covers the same closing stage again, so treat it as a chance to check your work rather than as a different construction step. Confirm that the seam runs down the back, that the wrong side was inside during seaming, and that the bonnet now sits with its right side showing.
Bottom Edging
The bottom edging is worked along the ends of the rows, rather than across the top or front of the piece. Its first row uses a skipping rhythm that gently shapes the fabric around the neck, and the following rows continue in single crochet. This stage softens the lower edge and helps the bonnet sit comfortably where it meets the neck.
Front Edging

For the front edging, turn the bonnet so you work across the front. Keep the stitches very loose and use a skipping rhythm, because loose work lets the edge draw in slightly and frame the face without pulling tight. This is a place to slow down and check the drape, since a tight front edge would change both comfort and appearance.
Straps
Each strap starts with a chain of 45 (50, 55, 60, 65), with the length depending on size, and is then worked back with slip stitches across the chain before fastening off. Join yarn to the opposite side of the bonnet and repeat the same strap there, so the bonnet has two matching straps for tying under the chin.
Finishing
To finish, weave in all ends so the inside stays tidy and no loose tails catch during wear. The source also invites makers to share photographs of their finished Dottie Bonnet on Facebook or Instagram, using a tag or the hashtag #tmhdottiebonnet, so other makers can enjoy the finished projects.
Support My Work 💛

Readers who enjoyed this free pattern can support the designer through Ko-fi, and can also join the mailing list to stay in touch. Support is optional and does not change the overview here, but it is a direct way to thank the maker behind the original Dottie Bonnet design.
Make the matching Dottie Dress!


The bonnet is shown with the matching Dottie Dress, which makes a coordinated set for photographs and special occasions. If you plan a matching outfit, check the original pattern page for the dress information and finish the bonnet first so the set works together.
Related overviews on this site include Lacey Crochet Baby & Toddler Bonnet- The Misha Bonnet: Pattern Overview and Monster baby booties - Pirates: Pattern Overview.


