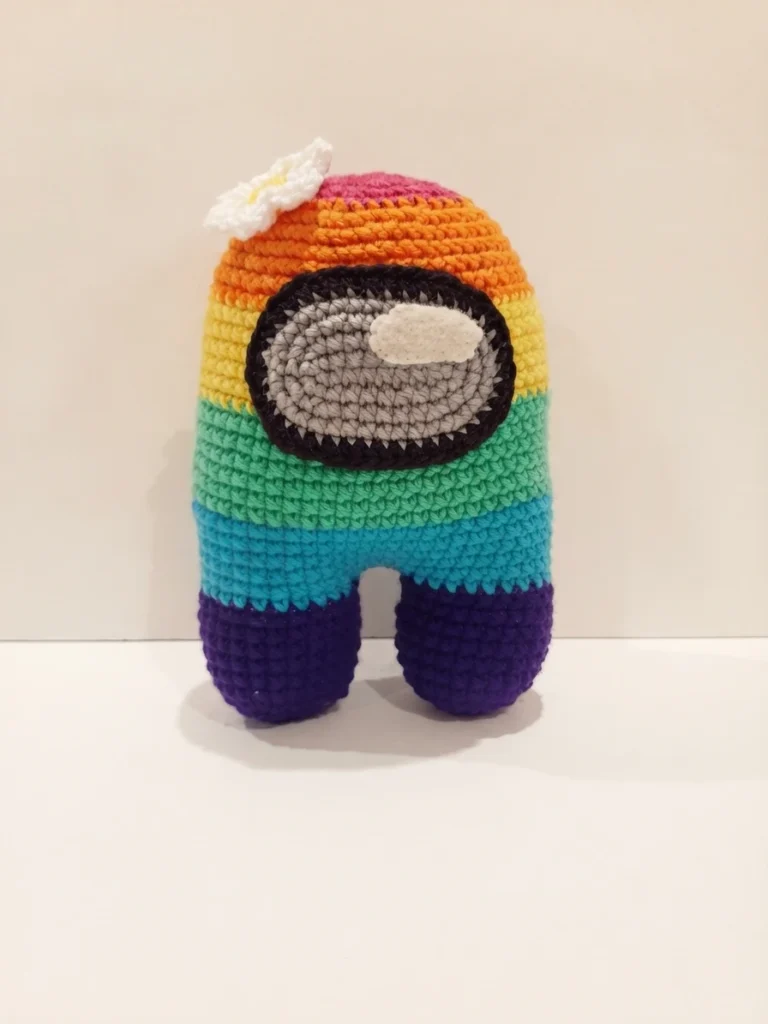
Project introduction


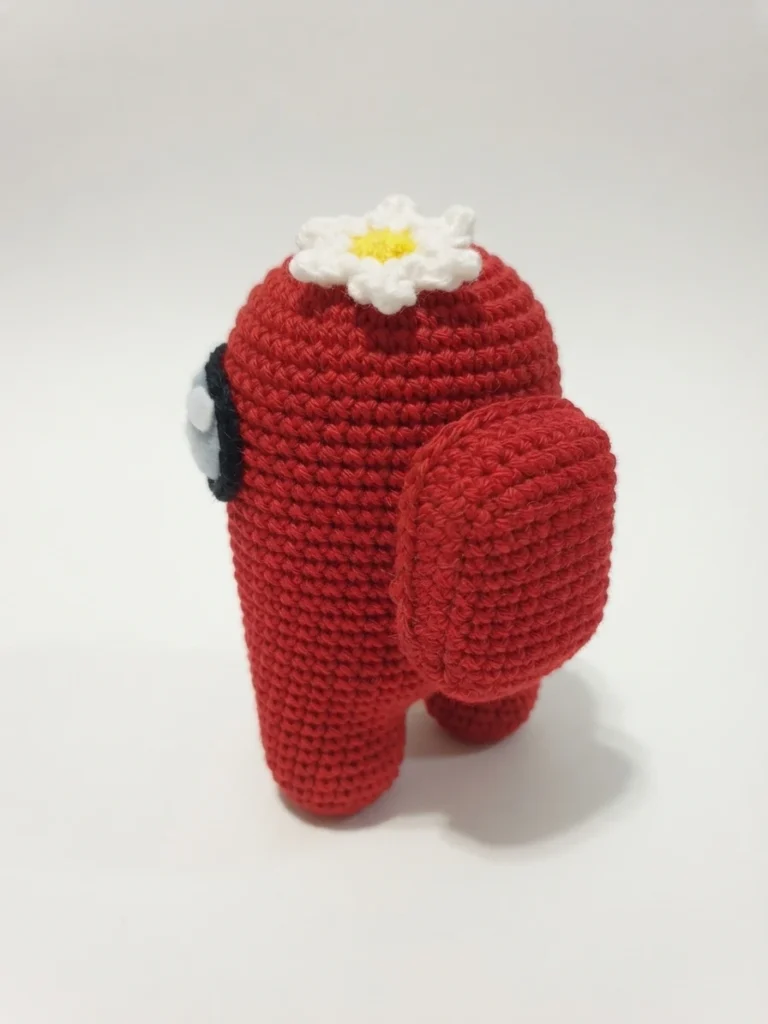


This pattern overview introduces a free Among Us style amigurumi project, and it is not a complete step by step tutorial. It explains what the finished figure includes, what you will need to gather, and how the parts fit together, so you can decide whether the project suits your skills before you begin. For the full designer instructions, visit the Original designer’s pattern and instructions.
The figure is built as a soft, rounded character with two short legs that join into a wider body. A large lens sits on the front, a small backpack adds detail at the back, and a tiny flower gives the top a playful finish. A separate hat is also included, so the finished piece can be styled with or without that extra layer, depending on the look you prefer for display or play.
You can work the body in one solid color for a classic, simple finish, or use six colors for a rainbow version that changes color as the body grows. The designer presents the project mainly as a single color project and marks rainbow color changes with a letter and number, which makes it easier to follow either version without losing your place. The lens, backpack, and flower use contrasting colors to keep the main features clear and easy to read.
Pattern format and preparation
Before you start, it helps to understand how this overview relates to the original pattern. The web pattern is described as free, while a PDF version is listed on Ravelry for a small fee, so the two formats do not share the same access terms. This article does not reproduce the full instructions, and readers who want the row by row details should use the original designer page linked above for the complete pattern and its pictures.
A few preparation notes from the designer can make assembly smoother. If you change yarn weight, choose a hook at least two full sizes smaller than the yarn recommends, because a tighter fabric helps prevent stuffing from showing through gaps. Leave generous tails when a piece will be sewn on, since a tail about three times the length of the piece gives you enough yarn to attach it securely. Tension varies from maker to maker, so the exact placement of small parts may shift slightly.
- Category 4 worsted weight yarn: about 50 yards each of 6 colors for the rainbow version, or about 300 of 1 color for a single color version.
- 50 yards of gray yarn for the lens, or your chosen color.
- 15 yards of black yarn to surround the lens.
- 35 yards for the backpack and flower.
- 3.5mm/E hook for worsted yarn, or 2 full sizes smaller than the yarn recommends for a different size yarn.
- 5mm/H hook for the hat.
- Tiny bit of white felt for the lens reflection.
- Small amount of string to attach the reflection piece.
- Stitch marker to mark the first stitch of every row.
- Sharp scissors.
- Yarn needle.
- Pins, optional but strongly recommended for pinning parts in place before attaching.
- Stuffing.
The skills used are practical amigurumi basics rather than advanced techniques. You will need to attach parts and limbs, work increases and decreases, and use single crochet, slip stitch, and double crochet, plus simple sewing for the lens. Rows are joined with a slip stitch, and a chain 1 begins a new row in the main pattern, which helps keep the rounds neat and consistent as you work.
- *: repeat; if the number of times is not specified, repeat to end of row or round.
- sc: single crochet.
- dc: double crochet.
- ch: chain.
- b/o: bind off.
- sl st: slip stitch.
- mr: magic ring.
- dec: decrease.
- inc: increase.
- st/sts: stitch/stitches.
- dc2tog: double crochet 2 together.
In general terms, the legs are made first and then joined to form the body, which is stuffed as it grows and shaped by gradual decreases toward the top. The lens is made separately, edged in black, and finished with a small white felt oval sewn on as a reflection. The backpack is worked back and forth as a flat rectangle before its sides are added, then it is centered on the back, lightly stuffed, and sewn in place.
The flower adds a small top detail, with a yellow center and white petals, while the hat is worked in the round and shaped by decreases before it is set above the lens and pulled down at the sides. Pinning each part before sewing helps you check balance and centering, especially for the backpack and lens. When you are ready for exact steps, return to the original designer pattern for the complete instructions and reference pictures.
Amigurumi Pink Among Us PDF: Pattern Overview
Bear Keychain Crochet Pattern [Among Us Style]: Pattern Overview


