Project introduction
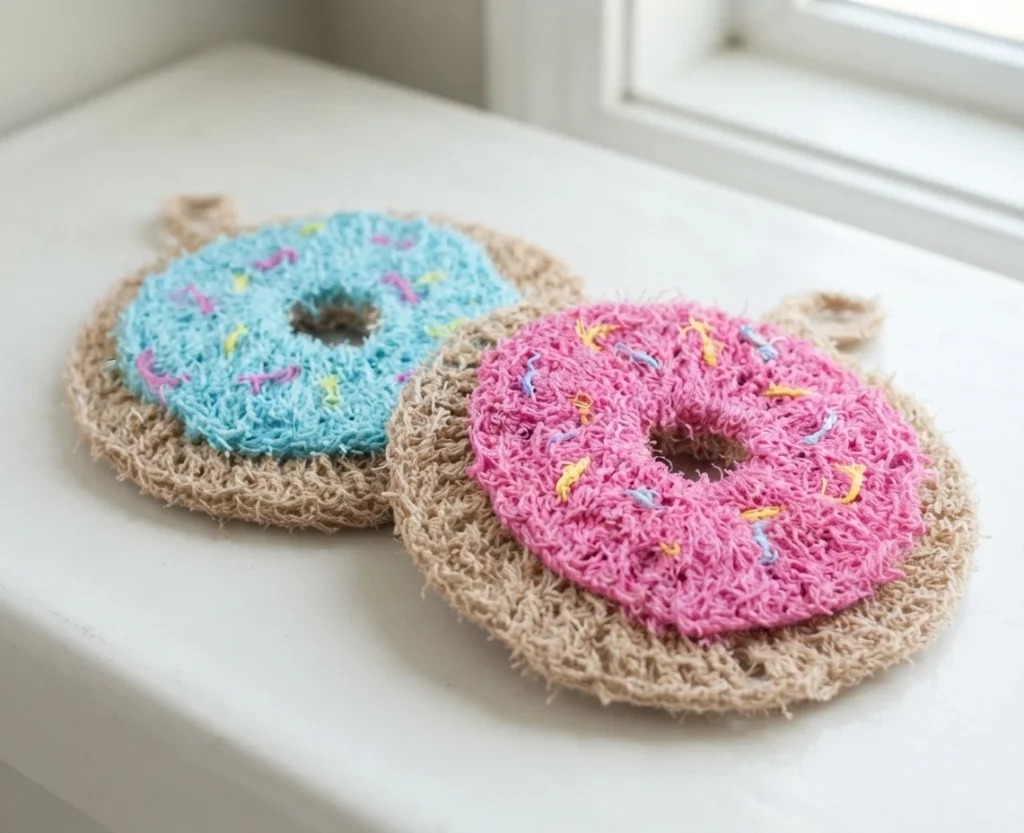
This is a pattern overview, not a complete step by step tutorial, for a playful crochet project from Fiber Flux. It introduces donut shaped scrubbies that bring a cheerful bakery look to everyday cleaning tasks. The design is presented as simple to make, making it a friendly choice for crocheters who want a quick and satisfying finish. You can find the full pattern through Original designer’s pattern and instructions.
These scrubbies are intended for use in the bath or in the kitchen, so a small set can be useful in more than one room. Making several in different frosting colors creates a coordinated set for your own home, and the finished pieces also work well as lighthearted gifts. A full video tutorial is also mentioned by the source, which can help visual learners follow the shaping and finishing. An ad-free PDF version is also mentioned, separate from the free web pattern.
Materials
Before you begin, plan a two color combination that reads clearly as a donut. One shade forms the donut base, while a contrasting shade creates the frosting layer on top. Keeping the same frosting shade for the sprinkle details helps the finished piece look coordinated without adding extra yarn colors to your shopping list.
- 5.5 mm (I) crochet hook
- Two colors of Red Heart Scrubby Cotton for each scrubby
- Tan for the donut base
- Tulip Pink for pink frosting
- Lemony for yellow frosting, featured in the video tutorial
- Caribbean for blue frosting
- Frosting colors, also used for sprinkles
- Tapestry needle
- Scissors
Sizing

The finished scrubby measures 6 inches across. That size keeps the piece easy to hold and move around a sink, tub, or countertop, while still giving enough surface for scrubbing. It also gives a clear expectation before you start, so you can picture how the finished donut will sit beside other cleaning supplies.
Abbreviations and Tutorial Links
Only four stitch types are used in this project, and all of them use United States crochet terminology. That small stitch vocabulary keeps the pattern approachable, especially if you are still building confidence with taller stitches. Use the linked tutorials below to review any stitch before you start, then return to the designer pattern for the project order.
Construction Overview for donut bottom (worked in tan)
The bottom layer is worked in tan and begins as a joined circle, giving the donut its round base and central opening. If you prefer a different starting method, a magic ring may be used instead of the chained circle. From that starting ring, the piece grows outward in rounds until the base reaches its full round shape.
A hanging loop is added to this bottom piece, which makes it easy to hang the scrubby up between uses. Once the loop is complete, fasten off and weave in any ends that remain, so the base is tidy and ready for its frosting layer.
Construction Overview for donut icing top (worked in blue or pink)
The icing top is worked in blue or pink frosting and also begins as a joined circle, mirroring the round shape of the base beneath it. A magic ring may be used instead of the chained circle if that is your preferred starting method. The layer then grows outward in rounds, forming a flat circular top that will sit over the tan base.
When the icing layer is complete, fasten off and weave in any ends that remain. Taking care with this finishing step keeps the top layer neat, so the frosting edge looks clean when the two layers are brought together later.
Assembly & Finishing

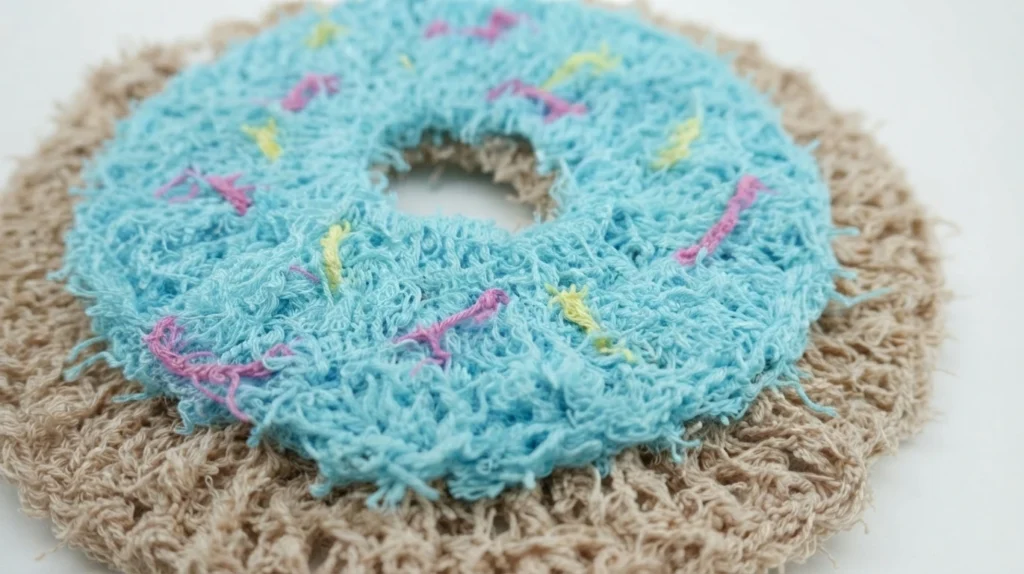
Sprinkles are added before the layers are joined, using different yarn colors with a running stitch. Place the short stitches in varied directions and keep their placement as random as possible, because that scattered look gives the donut a more realistic finished appearance.
Next, sandwich both layers together and sew them together using a matching piece of icing yarn. This step joins the base and frosting into one sturdy scrubby while keeping the seam in keeping with the frosting color. Weave in any ends that remain for a tidy finish.